November 02, 2016
By Bill Winke
Hunting deer is far from predictable. It is not like baking a pie or programming a computer, where you can expect a specific result if you do certain things.
We are working with tendencies and playing the odds when we hunt whitetails. I can't offer a guarantee, but I can offer a plan that has proven successful more often than others I have tried.
Advertisement
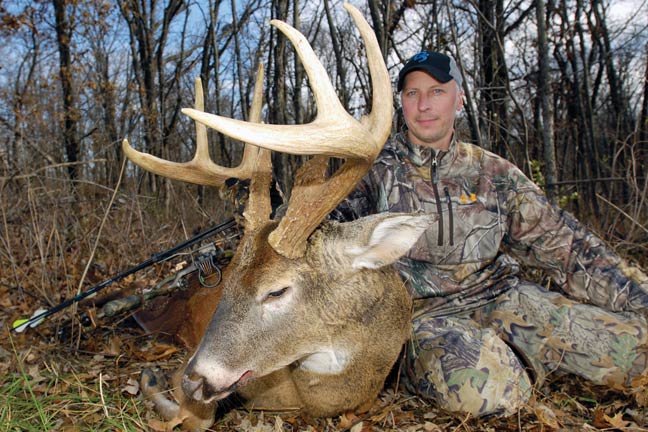
We are going to find the biggest buck on the property and then hunt him carefully — and we might just end up tagging him. That is a realistic goal.
Find Them First
I am going to assume you didn't get out to glass crop fields in the summer and didn't have trail cameras over a mineral site. So, you don't really have a starting point in mind.
Advertisement
Even if you did spot a few good bucks in the summer, they likely won't be in the same areas this fall anyway, so it is best to start with an open mind. It is mid-September and the process starts right now.
The easiest way to learn which bucks live in each part of your hunting area is to place a trail camera over a small pile of corn. In states where this is legal, it is definitely my first choice.
If it is not legal where you hunt, the process of finding bucks takes longer, but is still possible. You will need to make mock scrapes and put your cameras over those, as well as placing them over well-used trails.
With baited camera sites, you need one every 20-30 acres in areas with lots of habitat. In open areas, two cameras near each block of cover (on opposite sides) is enough. Regardless of setting, keep your cameras at least 200 yards apart to get the best coverage.
Obviously, if you hunt a big area, you will need to move cameras several times. Fortunately, when putting cameras over corn you will get photos of most of the deer in that area within a week and you can move on quickly.
Choose camera sites you can get to without walking deep into the cover. I like sites I can drive to in my truck — leaving no scent. Field edges, old clearings, food plots and farm lanes are all good spots. Wear waders when checking the cameras to reduce your scent.
It will take three or four days for most of the deer in each area to find the corn. Check the camera and refresh the site with another bag of corn after those first four days. Then you should be able to come back four days later and pull that card.
If you don't need the camera somewhere else, you may as well pour out another bag of corn and leave it for another four days. Pouring out bags of corn can get expensive fast.
At roughly $5 per bag, you will have $15 in each camera site just to get your inventory. Fortunately, once you know the core areas of the target bucks you are after, you can stop using the corn.
Finding Core Areas
Bucks will exhibit the most daylight activity in, and close to, their core areas. So, after finding the bucks, you need to fine-tune your search to find those sweet spots.
This is where the process becomes more art than science and where you will need to use good judgment to keep from bumping deer. Stick to the fringes and you should be fine.
Start with the photos you got in phase one. If the buck you are targeting was there often — and sometimes in daylight — you already have a good enough fix on his core area. You don't need to keep looking. However, if he was there sporadically, or only at night, you will need to backtrack the buck to find his core.
Pay attention to the direction he was coming from each evening when he approached the corn — that is the direction his butt will be pointing in the first photo of each sequence. By moving your camera in that direction, you can quickly zero in on his core.
You may have to jump areas of cover and look for him on the other side — stick to the fringes.
Within two moves of the camera you should be close enough to his core area to start thinking about where to put your stands. At this point, you can stop using corn to concentrate deer activity in front of the camera and move on to the monitoring phase.
Examining Your Options
Once you find the approximate core area of a buck you want to hunt, you can start to make your actual stand selections but you should also keep learning. I like to know the size of the core area of the bucks I am hunting so I know all my options.
For that reason, I often place cameras in other nearby areas just to see where the buck shows up. For example, if he is living in a spot that is hard to approach without being detected, or where the wind swirls, it would sure be nice to know where else he is spending time — hopefully a spot that is easier to hunt.
For this reason, keep running cameras around the core area even while you are forming your hunting plans. Run them over mock scrapes, over trails and over fields using the camera's field scan or time-lapse mode. By monitoring these cameras as often as possible, you will know when the buck is daylight active and where he is moving.
The Hunting Strategy
Ideally, at least one buck is showing occasional daylight activity in an area where he is killable. That is why you want to locate as many different targets as possible; not all of them will be huntable — and definitely not all at the same time. Having options makes for a much more enjoyable season.
When: Three green lights dictate when you should hunt a specific buck. The first is the most obvious — when you are getting daylight photos of the buck. Hunt him right away — his behavior may change quickly.
The second green light occurs when there is a cold front coming. Even if you have not been getting daylight photos of the buck, hunt him the day the cold front comes through and the day after (at the very least) in your best stands. If he is going to move in daylight prior to the rut, it will be during one of these cold fronts.
The third green light is, of course, the rut itself. Plan to be in your best stands when the first wave of does comes into estrus. Again, even if he has not been showing any daylight activity up to that point, this is still a bright green light. In most areas of the country, this occurs from roughly Nov. 3-8.
Where: There are many strategies, but here is a very simple one that has proven successful. First, find all the funnels you can in and around the buck's core area. Decide which ones are easiest to hunt.
They will be the ones that you can get to and from without alerting deer and those where you have a wind
advantage while on stand. Now, from that short list, hunt the ones close to feeding areas in the evenings and the ones close to doe bedding areas in the mornings.
You may also hunt the feeding areas and the bedding areas themselves, but that carries higher risk. If you can avoid hunting right on top of these endpoints, you will keep your hunting area fresher longer.
Summary
Killing one of the biggest bucks in your area comes down to finding as many targets as possible, then learning as much as you can about where each one lives. Within those areas, select stand sites over the best funnels.
Finally, monitor the bucks with trail cameras in each area and wait until one of three things triggers your next move: a buck starts to show daylight activity, a cold front comes through or the rut arrives.
This is not a magic formula with a guarantee for success, but it will work surprisingly well if you follow all the steps and hunt as carefully as possible. This is exactly what I am doing right now. So, we are all in this together.
